Install Ajenti Server Dashboard on Ubuntu 24.04 LTS, Step by Step Guide
How to Install Ajenti Web Interface Platform on Ubuntu LTS 24.04

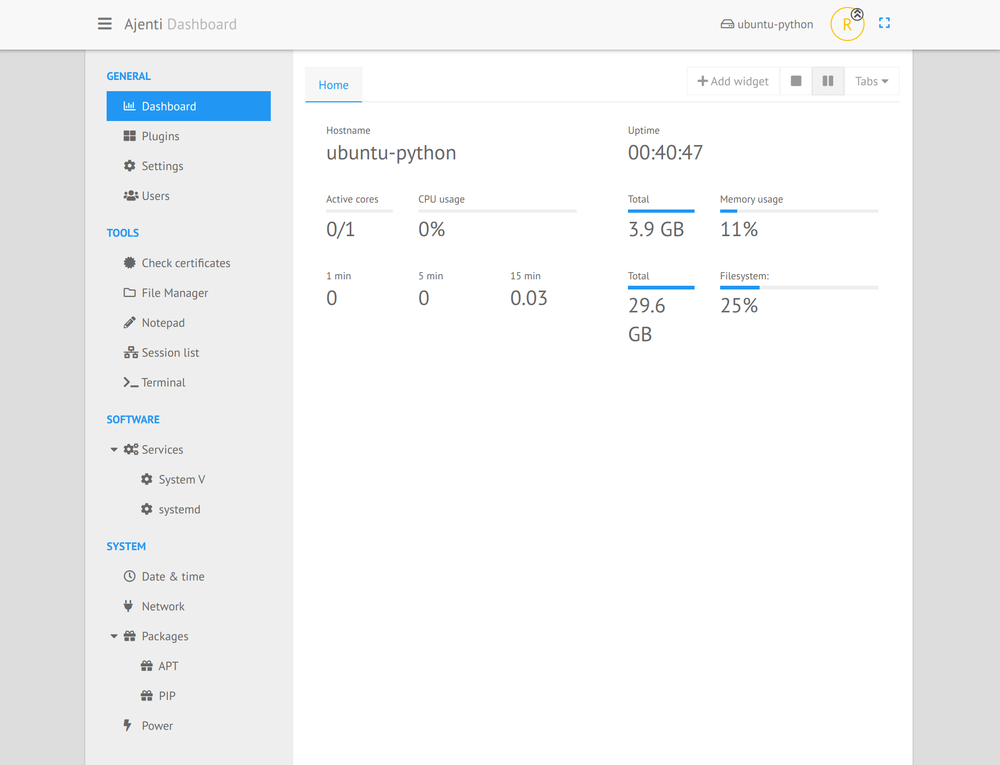
Table of Content
Ajenti is a lightweight, powerful, and easy-to-use web-based control panel for managing your server. It's particularly useful for those who prefer a graphical interface over command-line management.
Ajenti is widely used by a diverse range of users, including small to medium enterprises (SMEs) that require a lightweight server management solution, web hosting providers who offer a simple management interface to their clients, and freelancers and developers for managing development servers and personal projects.
It is also popular in educational institutions for teaching and managing lab servers, as well as among home lab enthusiasts and hobbyists who run their own servers.
Features
- Web-Based Interface: Intuitive, accessible from any device with a browser.
- Responsive design: works seamlessly on all browsers
- Lightweight: Minimal resource consumption, ideal for low-resource environments.
- Real-Time Monitoring: Tracks CPU, memory, and disk usage in real-time.
- Service Management: Easily start, stop, and restart services.
- File Manager: Manage server files through a built-in interface.
- Firewall Management: Configure and manage firewall rules.
- Multi-User Support: Create users with customizable permissions.
- Terminal Access: Integrated terminal for command-line operations.
- System Configuration: Manage network settings, timezones, and more.
- Plugin System: Extend functionality with various plugins.
Best Ajenti Plugins
- Ajenti V: Hosts websites, manages multiple sites, domains, and SSL certificates.
- Docker Management: Manages Docker containers through the interface.
- MySQL Plugin: Graphical interface for MySQL database management.
- FTP Plugin: Setup and manage FTP servers, users, and directories.
- Nginx Plugin: Manages Nginx configurations, virtual hosts, and SSL.
- Cron Job Manager: Simplifies scheduling and managing cron jobs.
- Firewall Plugin: Easy management of firewall rules.
- Mail Server Plugin: Setup and manage mail services, domains, and mailboxes.
- SysInfo Plugin: Displays detailed system information and uptime.
- Backups Plugin: Automates and manages data backups.
Tech Stack
- Python: Core language for development.
- JavaScript/HTML/CSS: Front-end technologies for the web interface.
- Flask: Micro web framework for the back-end.
- GEvent: Asynchronous I/O library for handling connections.
- WSGI: Interface for serving the web application.
- SQLite: Default database for configuration and user data.
- Bootstrap: Framework for the responsive web interface.
This tutorial will guide you through the steps to install Ajenti on Ubuntu LTS 24.04.
Prerequisites
- A server running Ubuntu LTS 24.04.
- A user with sudo privileges.
- Basic understanding of the Linux command line.
Install
Step 1: Update Your System
Before starting the installation, it’s a good practice to update your package list and upgrade any existing packages.
sudo apt update
sudo apt upgrade -y
Step 2: Install Required Dependencies
Ajenti requires certain dependencies to be installed on your system. Use the following commands to install them:
sudo apt install -y wget curl software-properties-common
Step 3: Add Ajenti Repository
Ajenti is not included in the official Ubuntu repositories, so you need to add its official repository to your system.
wget -O - https://repo.ajenti.org/debian/key | sudo apt-key add -
echo "deb http://repo.ajenti.org/ng/debian main main ubuntu" | sudo tee /etc/apt/sources.list.d/ajenti.list
Step 4: Install Ajenti
Now, update the package list again to include the Ajenti repository, then install Ajenti.
sudo apt update
sudo apt install ajenti -y
Step 5: Start and Enable Ajenti
After installation, start the Ajenti service and enable it to start on boot:
sudo systemctl start ajenti
sudo systemctl enable ajenti
Step 6: Adjust Firewall Settings
If your firewall is enabled, you need to allow traffic on port 8000, which is the default port Ajenti uses.
sudo ufw allow 8000/tcp
sudo ufw reload
Step 7: Access Ajenti Web Interface
Ajenti runs on port 8000 by default. To access the web interface, open your web browser and navigate to:
https://your-server-ip:8000
Step 8: Login to Ajenti
Upon your first login, you’ll be prompted to enter the username and password. The default credentials are:
- Username: root
- Password: admin
For security reasons, it's recommended to change the default password immediately after logging in.
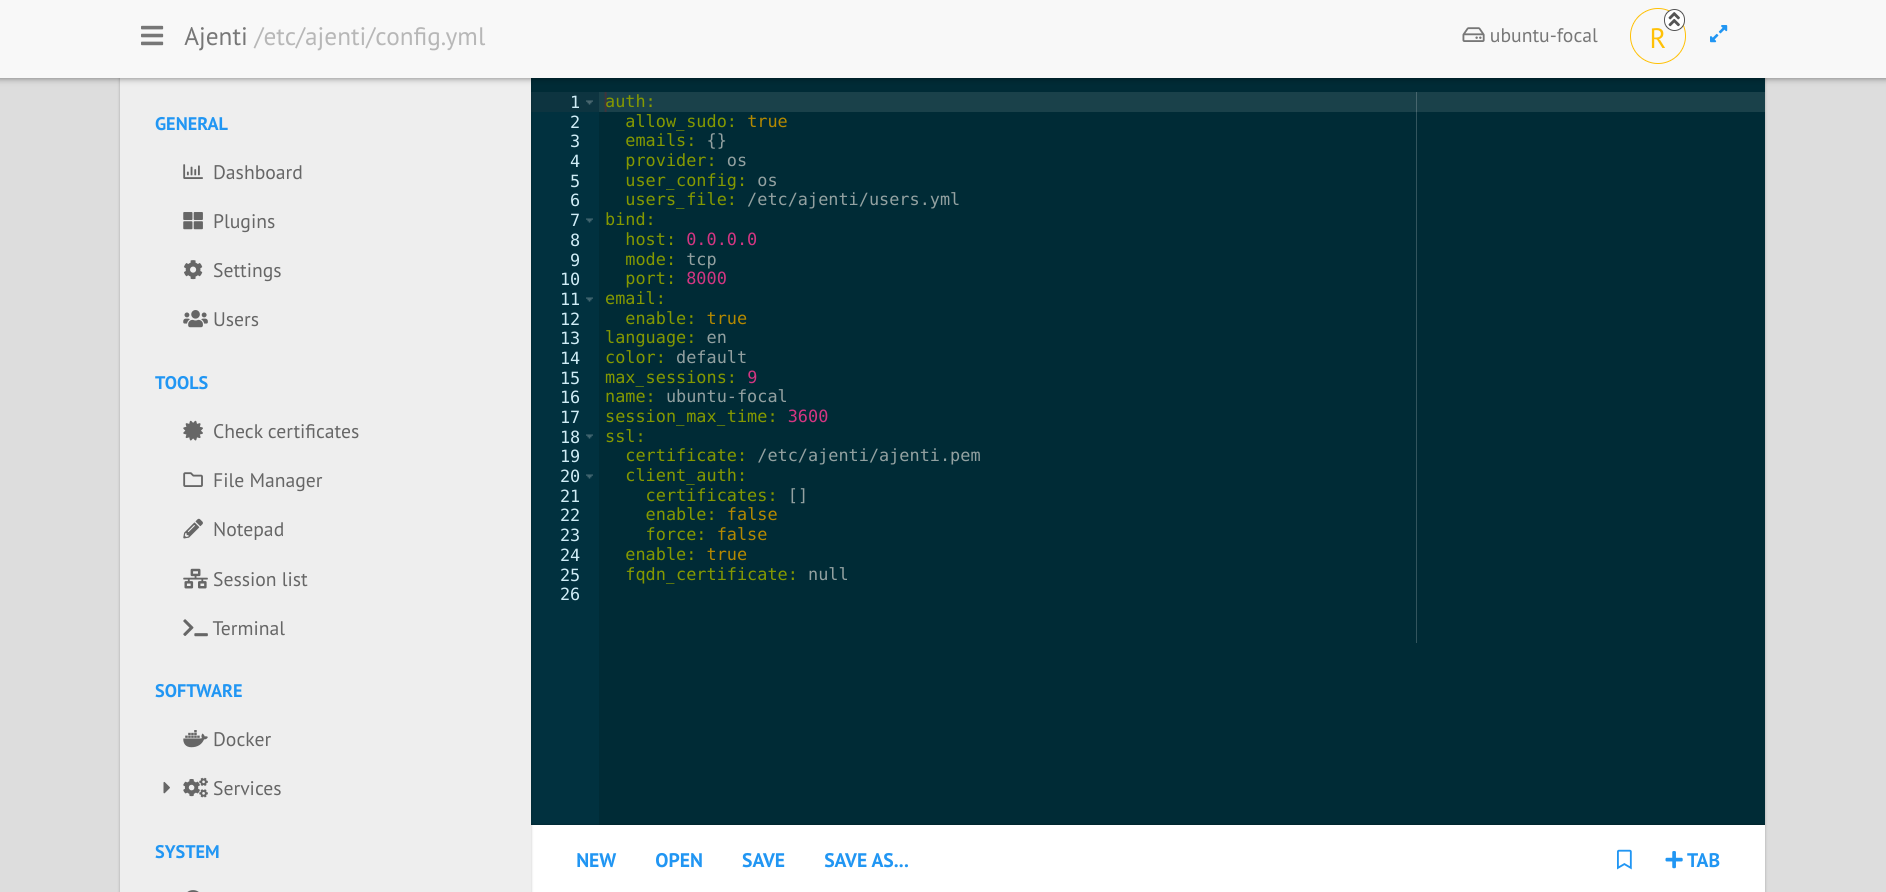
Step 9: Secure Ajenti with SSL (Optional)
To enhance security, you may want to secure your Ajenti installation with SSL. This can be done using Let's Encrypt:
- Once obtained, edit the Ajenti configuration to use SSL by modifying the
/etc/ajenti/config.ymlfile and setting the paths to your SSL certificate and key.
Obtain an SSL certificate:
sudo certbot certonly --nginx -d your-domain
Install Certbot:
sudo apt install certbot python3-certbot-nginx -y
Conclusion
You have successfully installed Ajenti on your Ubuntu LTS 24.04 server. Ajenti provides a powerful web-based interface to manage your server, making it easier to perform tasks that would otherwise require command-line knowledge. Explore its features and customize it to suit your needs.
Resources
 ajenti