Tutorial: How to Install Webmin on Ubuntu 24.04 LTS

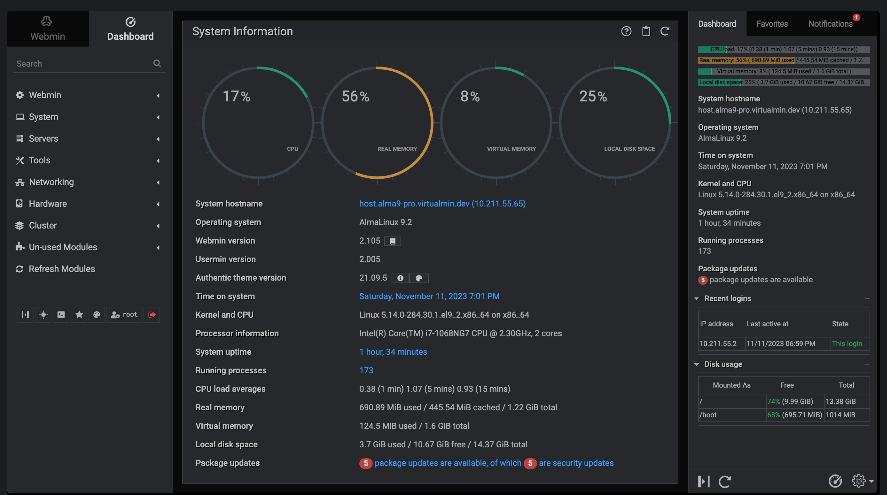
Table of Content
Webmin is a powerful, web-based interface for system administration for Unix-like systems, including Ubuntu.
It allows you to manage your server from a web browser, eliminating the need for command-line operations for routine tasks. In this tutorial, I'll guide you through the steps to install Webmin on Ubuntu.
 Hazem Abbas
Prerequisites
Before you begin, ensure that:
- You have a server running Ubuntu.
- You have root or sudo privileges.
Update Your System
First, it’s a good practice to update your system to ensure all existing packages are up to date. Open your terminal and run:
sudo apt update && sudo apt upgrade -y
Install Required Dependencies
Webmin requires a few dependencies to be installed on your system. Run the following command to install them:
sudo apt install software-properties-common apt-transport-https wget -y
Add the Webmin Repository
Next, add the Webmin repository to your system’s sources list. This ensures that you’ll get the latest version of Webmin. Run the following command:
sudo wget -q http://www.webmin.com/jcameron-key.asc -O- | sudo apt-key add -
Then, add the Webmin repository to your sources list:
sudo sh -c 'echo "deb http://download.webmin.com/download/repository sarge contrib" > /etc/apt/sources.list.d/webmin.list'
Install Webmin
With the repository added, you can now install Webmin. First, update the package lists again to include the Webmin repository:
sudo apt update
Then, install Webmin:
sudo apt install webmin -y
Access Webmin
By default, Webmin runs on port 10000. You can access Webmin by entering your server’s IP address followed by :10000 in your web browser. For example:
https://your-server-ip:10000
You’ll be prompted with a login screen. Use your root username and password or any user with sudo privileges to log in.
Configure Firewall (Optional)
If you’re using UFW (Uncomplicated Firewall), you’ll need to allow access to port 10000 to use Webmin. Run the following command to open the port:
sudo ufw allow 10000
You can also check the status of your firewall to ensure the rule has been added:
sudo ufw status
Secure Webmin
Webmin is accessible via HTTPS by default, but it's always a good idea to secure it further:
Set up SSL Certificate: You can use Let's Encrypt or your SSL certificate for securing the connection.
Configure User Authentication: Webmin allows you to create different users with different access levels, which helps in managing permissions securely.
Final Note
You have successfully installed Webmin on your Ubuntu server. You can now manage your system via the Webmin interface, which simplifies many administrative tasks through a user-friendly web interface.
Remember to regularly update Webmin to benefit from the latest features and security patches.
For more details and advanced configurations, you can refer to the official Webmin documentation.
 Jamie Cameron